The Functions Editing Environment
Segment Functions create reusable code that can be run in your Segment workspace either as sources to format incoming events, or as destinations, to handle specific event types.
When you create a function, write code for it, and save it, the function appears in the Catalog in your workspace only. You can then deploy that function in your workspace just as you would a conventional source or destination.
Access to Functions is controlled by specific access management roles. You may need additional access to create and deploy functions.
Creating functions
Only Functions admins can create or edit functions.
- From your workspace, go to the Catalog and click the Functions tab.
- Click Create function.
-
Select the type of function you want to build, and click Build.
When you click Build, a code editor appears. Different template code is available depending on which type of function you created.
- Use the editor to write the code for your function, configure settings, and test the function’s behavior.
- Once you finish writing your function, click Configure to give it a name.
- Click Create Function to save your work and make this function available in your workspace.
After you click Create Function, the function appears on the Functions catalog page in your workspace.
Editing a function
If you are a Workspace Owner or Functions Admin, you can manage your function from the Functions catalog page.
If you’re editing an existing function, you can Save changes without changing the behavior of existing instances of the function.
You can also choose to Save & Deploy to push changes to all, or specific functions in your workspace that are already deployed. You might need additional permissions to deploy these changes.
Testing a function
You have the option to test your functions code with either a sample event or by loading a default event that you can customize yourself.
- Sample event: When you click Test with custom event you can select a sample event from any of your workspace sources to test this function.
- Customize the event yourself: When you click customize the event yourself a default event payload loads which you can modify with the desired data. You have the option to paste in a JSON event or click Manual Mode and type in the fields manually. If you’d like to locate a recent event from a source that’s not available by following the sample event instruction:
- Navigate to the source debugger.
- Click the event you want to test and copy the raw JSON payload.
- Paste the raw JSON payload into your Function Editor.
Once the payload you want to test is ready, click Run.
If you create settings in your function, then you need to fill in the setting values before clicking Run.
Deploying source functions
You must be a Workspace Owner or Source Admin to connect an instance of your function in your workspace.
- From the Functions tab, locate the source function you want to deploy.
- Click Connect Source and follow the prompts to configure the source. (You can access these settings later by navigating to the Source Settings page for your source function.)
- Locate the webhook URL for the source, either on the Overview or Settings → Endpoint page.
- Copy this URL and paste it into the upstream tool or service.
Deploying destination functions
If you’re editing an existing function, you can Save changes without changing the behavior of your deployed function. You can also choose to Save & Deploy to push changes to all, or specific functions in your workspace that are already deployed.
When you deploy your destination function in your workspace, you fill out the settings on the destination configuration page, similar to how you would configure a normal destination.
Functions Versioning
With Functions Versioning, you can access a complete change history for each source or destination function. View version history and creation details, then use a unified or split display to compare code and restore previous versions of a function.
View and compare version history
To view the version history of a function:
- Navigate to Connections > Catalog > Functions.
- Select your source or destination function.
- Select Edit Function, then click Version history.
Select previous versions to compare code using a unified or split view. With the split view, Segment displays the latest version on the left and the version you’ve selected on the right.
Unified and split compare screens are read-only. While you can copy code, you can’t make changes directly from these screens.
LATEST and DEPLOYED versions
In the Version History panel, Segment displays LATEST and DEPLOYED labels that represent a function version state. You’ll see the LATEST version at the top.
Segment labels a version as the LATEST when:
- You save a change to the function source code, but don’t deploy the function at the same time.
- You restore a previous version from your function’s version history.
The DEPLOYED version is the function version that’s currently deployed.
Restore a previous version
To restore a previous function version:
- Select the function you want to restore.
- Click Restore this version.
- Segment creates a duplicate of the selected version and labels it as the
LATESTversion.
- Segment creates a duplicate of the selected version and labels it as the
- Click Restore on the confirmation screen.
- To deploy the restored version, click Save and Deploy on the Source Code screen.
Use Versioning with Segment’s Public API
You can use Functions Versioning with Segment’s Public API to retrieve version history records and source code, as well as to restore previous versions.
Here are some Public API use case examples:
Get Version history: Use the /versions endpoint to retrieve a list of version records and metadata of a certain page size. You can also use this endpoint to get version source code for a given version ID.
Restore a previous version: Use the /restore endpoint to restore a previous function version. This creates a new version with the same source as the version you are restoring.
Create or update versions: Create or update a function to add a version record and save the source code.
Deploy a function: Use the Public API to deploy a function. After you deploy, Segment marks the function version as DEPLOYED. Learn more about function version states here.
View Segment’s Public API docs for more information on how to use Functions Versioning with the Public API.
Functions permissions
Functions have specific roles which can be used for access management in your Segment workspace.
Access to functions is controlled by two permissions roles:
- Functions Admin: Create, edit, and delete all functions, or a subset of specified functions.
- Functions Read-only: View all functions, or a subset of specified functions.
You also need additional Source Admin permissions to enable source functions, connect destination functions to a source, or to deploy changes to existing functions.
️Settings and secrets
Settings allow you to pass configurable variables to your function, which is the best way to pass sensitive information such as security tokens. For example, you might use settings as placeholders to use information such as an API endpoint and API key. This way, you can use the same code with different settings for different purposes. When you deploy a function in your workspace, you are prompted to fill out these settings to configure the function.
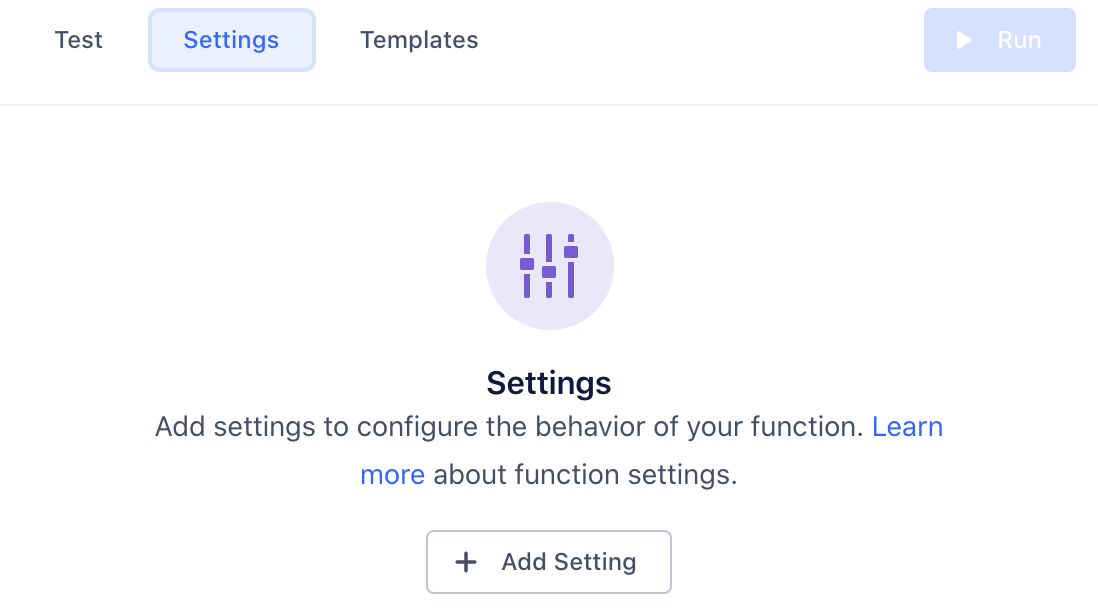
First, add a setting in Settings tab in the code editor:

Click Add Setting to add your new setting.

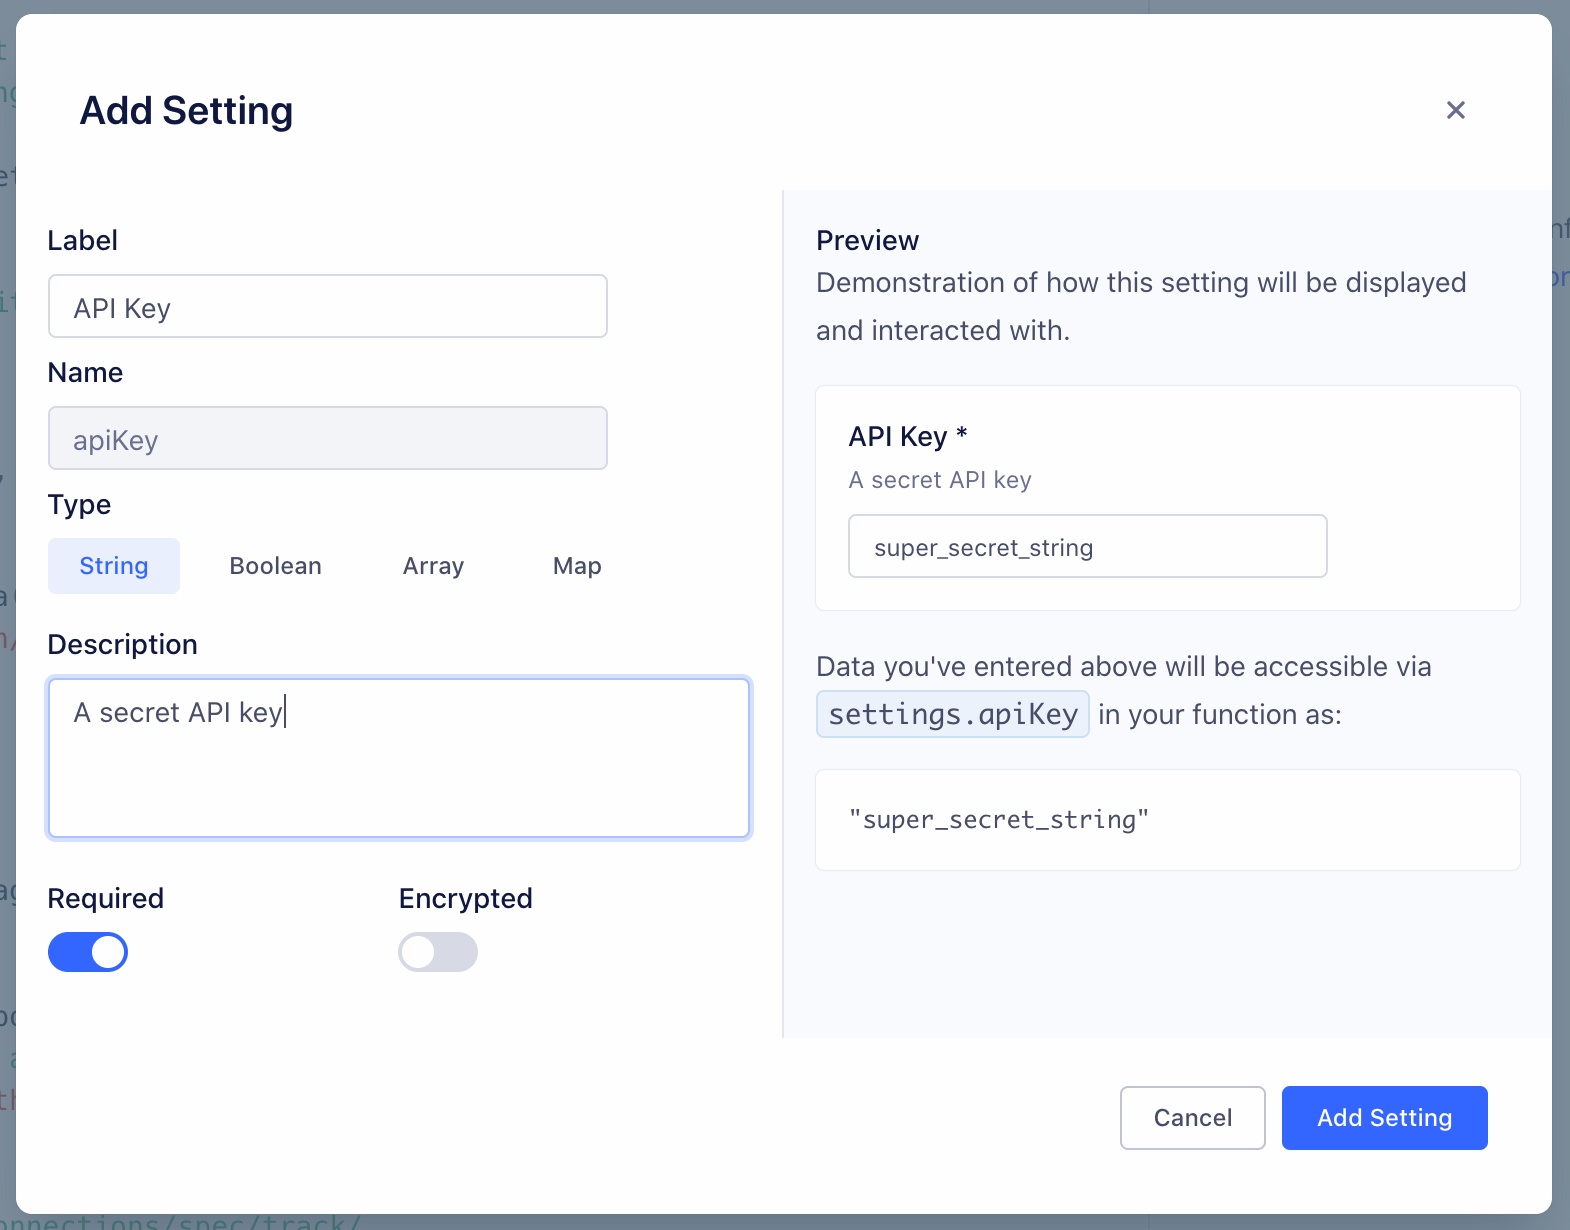
You can configure the details about this setting, which change how it’s displayed to anyone using your function:
- Label - Name of the setting, which users see when configuring the function.
- Name - Auto-generated name of the setting to use in function’s source code.
- Type - Type of the setting’s value.
- Description - Optional description, which appears below the setting name.
- Required - Enable this to ensure that the setting cannot be saved without a value.
- Encrypted - Enable to encrypt the value of this setting. Use this setting for sensitive data, like API keys.
As you change the values, a preview to the right updates to show how your setting will look and work.
Click Add Setting to save the new setting.
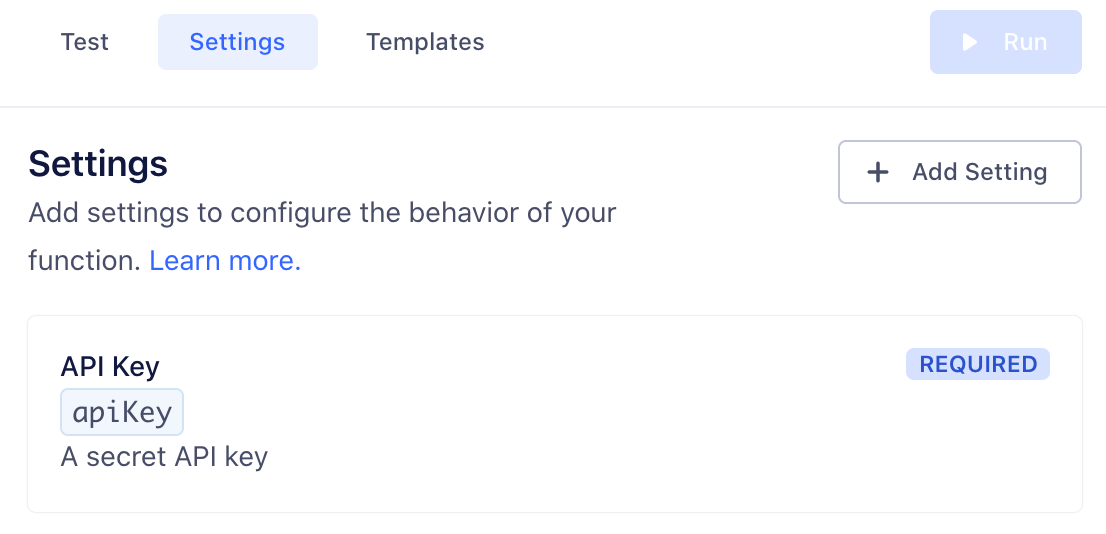
Once you save a setting, it appears in the Settings tab for the function. You can edit or delete settings from this tab.

Runtime and dependencies
On March 26, 2024, Segment is upgrading the Functions runtime environment to Node.js v18, which is the current long-term support (LTS) release.
This upgrade keeps your runtime current with industry standards. Based on the AWS Lambda and Node.js support schedule, Node.js v16 is no longer in Maintenance LTS. Production applications should only use releases of Node.js that are in Active LTS or Maintenance LTS.
All new functions will use Node.js v18 starting March 26, 2024.
For existing functions, this change automatically occurs as you update and deploy an existing function. Segment recommends that you check your function post-deployment to ensure everything’s working. Your function may face issues due to the change in sytax between different Node.js versions and dependency compatibility.
Limited time opt-out option
If you need more time to prepare, you can opt out of the update before March 19, 2024.
Note that if you opt out:
- The existing functions will continue working on Node.js v16.
- You won’t be able to create new functions after July 15, 2024.
- You won’t be able to update existing functions after August 15, 2024.
- You won’t receive future bug fixes, enhancements, and dependency updates to the functions runtime.
Contact Segment to opt-out or with any questions.
Node.js 18
Segment strongly recommends updating to Node.js v18 to benefit from future runtime updates, the latest security, and performance improvements.
Functions do not currently support importing dependencies, but you can contact Segment Support to request that one be added.
The following dependencies are installed in the function environment by default.
atob v2.1.2exposed asatobaws-sdk v2.488.0exposed asAWSbtoa v1.2.1exposed asbtoafetch-retryexposed asfetchretrylib.fetchretryform-data v2.4.0exposed asFormData@google-cloud/automl v2.2.0exposed asgoogle.cloud.automl@google-cloud/bigquery v5.3.0exposed asgoogle.cloud.bigquery@google-cloud/datastore v6.2.0exposed asgoogle.cloud.datastore@google-cloud/firestore v4.4.0exposed asgoogle.cloud.firestore@google-cloud/functions v1.1.0exposed asgoogle.cloud.functions@google-cloud/pubsub v2.6.0exposed asgoogle.cloud.pubsub@google-cloud/storage v5.3.0exposed asgoogle.cloud.storage@google-cloud/tasks v2.6.0exposed asgoogle.cloud.taskshubspot-api-nodejsexposed ashubspotlib.hubspotjsforce v1.11.0exposed asjsforcejsonwebtoken v8.5.1exposed asjsonwebtokenlibphonenumber-jsexposed aslibphonenumberjslib.libphonenumberjslodash v4.17.19exposed as_mailchimp marketingexposed asmailchimplib.mailchimpmailjetexposed asconst mailJet = nodemailjet.nodemailjet;moment-timezone v0.5.31exposed asmomentnode-fetch v2.6.0exposed asfetchoauth v0.9.15exposed asOAuth@sendgrid/client v7.4.7exposed assendgrid.client@sendgrid/mail v7.4.7exposed assendgrid.mailskyflowexposed asskyflowlib.skyflowstripe v8.115.0exposed asstripetwilio v3.68.0exposed astwiliouuidv5 v1.0.0exposed asuuidv5.uuidv5winston v2.4.6exposed asconst winston = winstonlib.winstonxml v1.0.1exposed asxmlxml2js v0.4.23exposed asxml2js-
zlib v1.0.5exposed aszlib.zlib
uuidv5is exposed as an object. Useuuidv5.uuidv5to access its functions. For example:async function onRequest(request, settings) { uuidv5 = uuidv5.uuidv5; console.log(typeof uuidv5); //Generate a UUID in the default URL namespace var urlUUID = uuidv5('url', 'http://google/com/page'); console.log(urlUUID); //Default DNS namespace var dnsUUID = uuidv5('dns', 'google.com'); console.log(dnsUUID); }zlib’s asynchronous methodsinflateanddeflatemust be used withasyncorawait. For example:zlib = zlib.zlib; // Required to access zlib objects and associated functions async function onRequest(request, settings) { const body = request.json(); const input = 'something'; // Calling inflateSync method var deflated = zlib.deflateSync(input); console.log(deflated.toString('base64')); // Calling inflateSync method var inflated = zlib.inflateSync(new Buffer.from(deflated)).toString(); console.log(inflated); console.log('Done'); }
The following Node.js modules are available:
cryptoNode.js module exposed ascrypto.httpsNode.js module exposed ashttps.
Other built-in Node.js modules aren’t available.
For more information on using the aws-sdk module, see how to set up functions for calling AWS APIs.
Caching
Basic cache storage is available through the cache object, which has the following methods defined:
cache.load(key: string, ttl: number, fn: async () => any): Promise<any>- Obtains a cached value for the provided
key, invoking the callback if the value is missing or has expired. Thettlis the maximum duration in milliseconds the value can be cached. If omitted or set to-1, the value will have no expiry.
- Obtains a cached value for the provided
cache.delete(key: string): void- Immediately remove the value associated with the
key.
- Immediately remove the value associated with the
Some important notes about the cache:
- When testing functions in the code editor, the cache will be empty because each test temporarily deploys a new instance of the function.
- Values in the cache are not shared between concurrently-running function instances; they are process-local which means that high-volume functions will have many separate caches.
- Values may be expunged at any time, even before the configured TTL is reached. This can happen due to memory pressure or normal scaling activity. Minimizing the size of cached values can improve your hit/miss ratio.
- Functions that receive a low volume of traffic may be temporarily suspended, during which their caches will be emptied. In general, caches are best used for high-volume functions and with long TTLs. The following example gets a JSON value through the cache, only invoking the callback as needed:
const ttl = 5 * 60 * 1000 // 5 minutes
const val = await cache.load("mycachekey", ttl, async () => {
    const res = await fetch("http://echo.jsontest.com/key/value/one/two")
    const data = await res.json()
    return data
})
This page was last modified: 13 Nov 2023
Need support?
Questions? Problems? Need more info? Contact Segment Support for assistance!