Single Sign On team management
Single Sign-on is only available in Business plan workspaces.
See the available plans, or contact Support.
Segment supports Single Sign On for Business Tier accounts. You can use any SAML-based Identity Provider (IdP), for example Okta, Bitium, OneLogin, or Centrify, or use GSuite to serve as your identity provider, delegating access to the application based on rules you create in your central identity management solution.
With SSO, you have centralized control over your users’ ability to authenticate or not in your IdP. You can also enforce rules like two-factor authentication or password rotation at the IdP level.
You can configure as many IdP connections to your workspace as needed to support IdP-initiated authentication. This allows seamless migration from one system to a new one, if, for example, your organization switches IdP vendors or switches from GSuite to a dedicated SAML IdP like Okta or OneLogin.
To enable SSO-based login from the Segment login page (app.segment.com/login), you must first verify that you own the domain, and connect it to your organization’s Segment account. After you have done that, SSO users from your domain can use the Segment login page to access your default Segment workspace.
The Segment login page can only be connected to one workspace. To use your IdP with multiple workspaces, you will have to initiate login to the other workspaces from the IdP instead of through the login portal.
Set up — SAML
Segment’s SSO configuration is entirely self-service. Additionally, Segment has prebuilt connections with Okta , OneLogin, and Microsoft Entra ID which can help you get set up faster. Reach out to support if you run into any questions or issues.
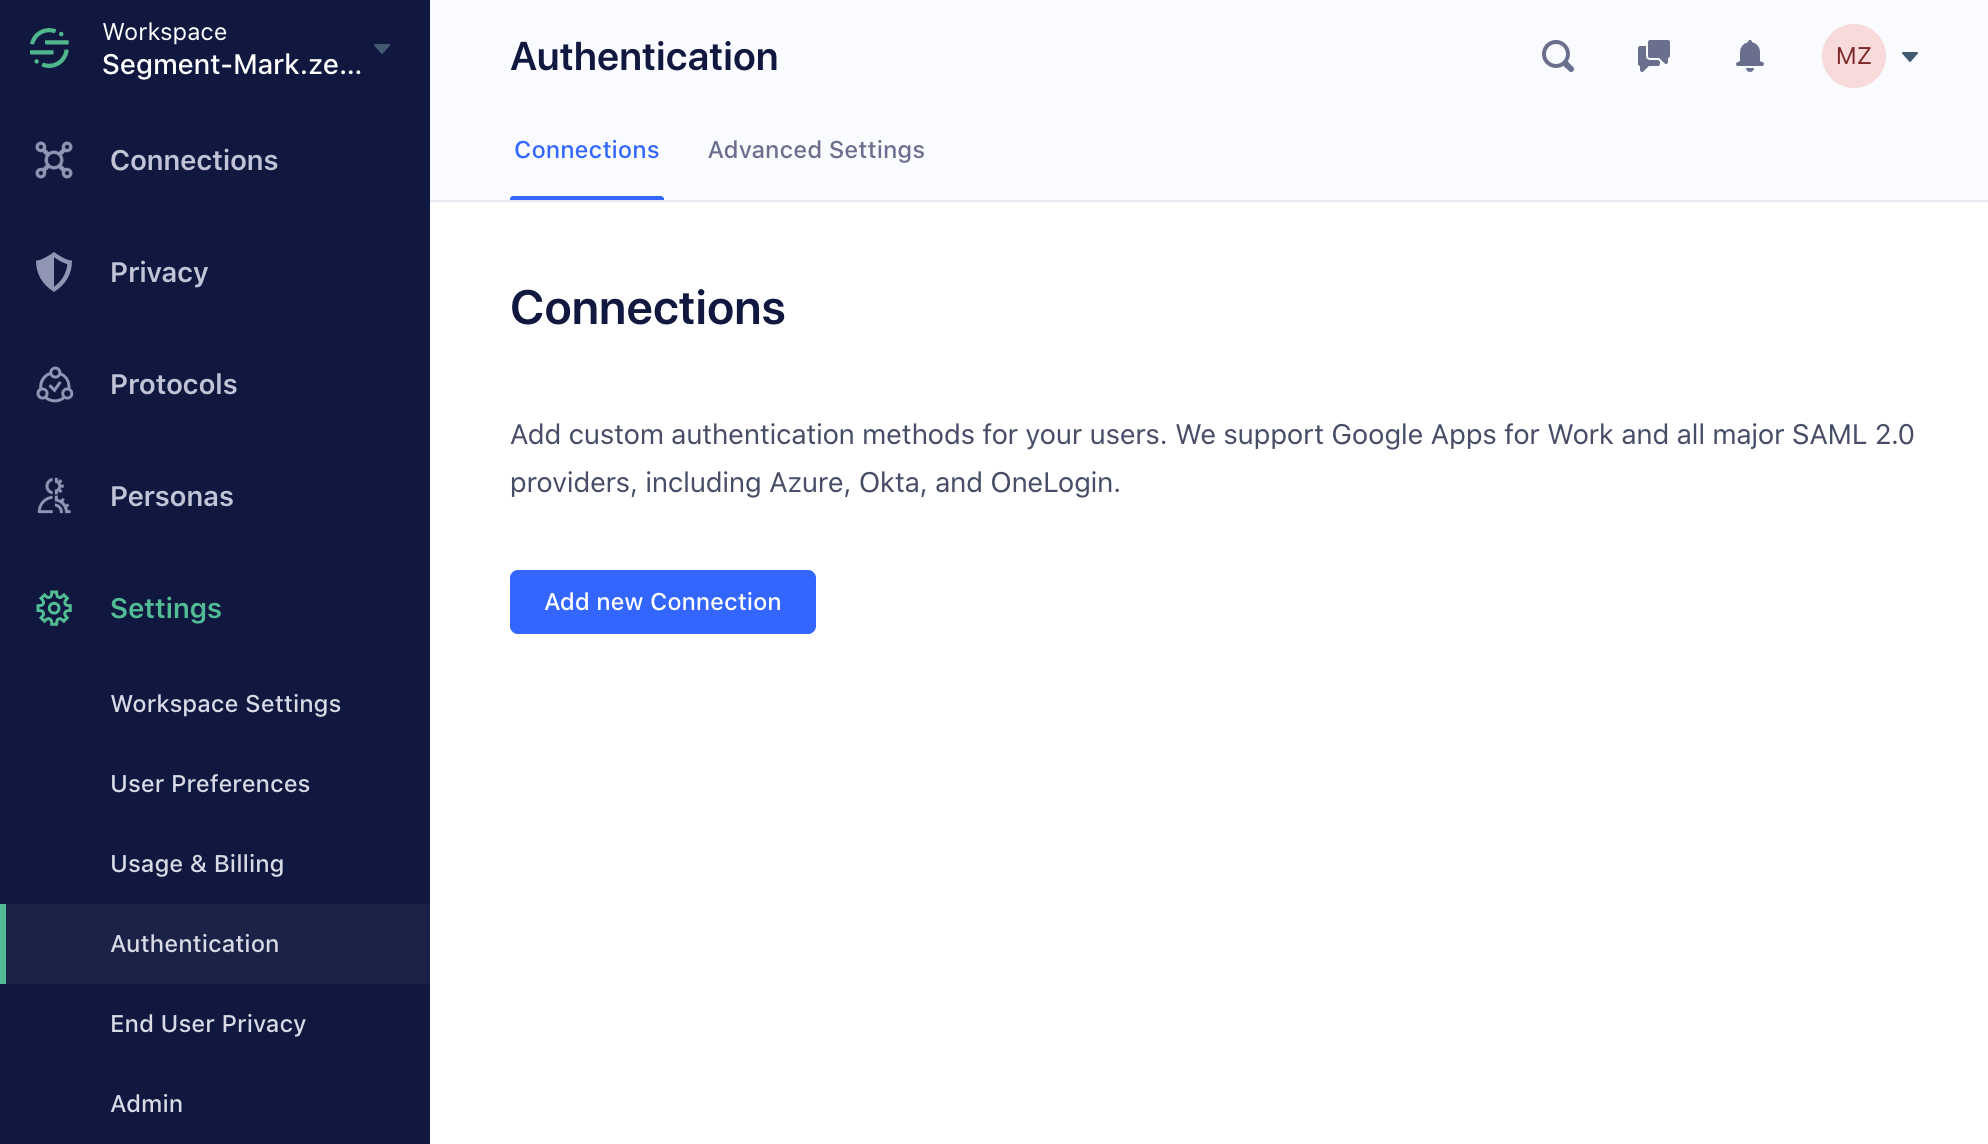
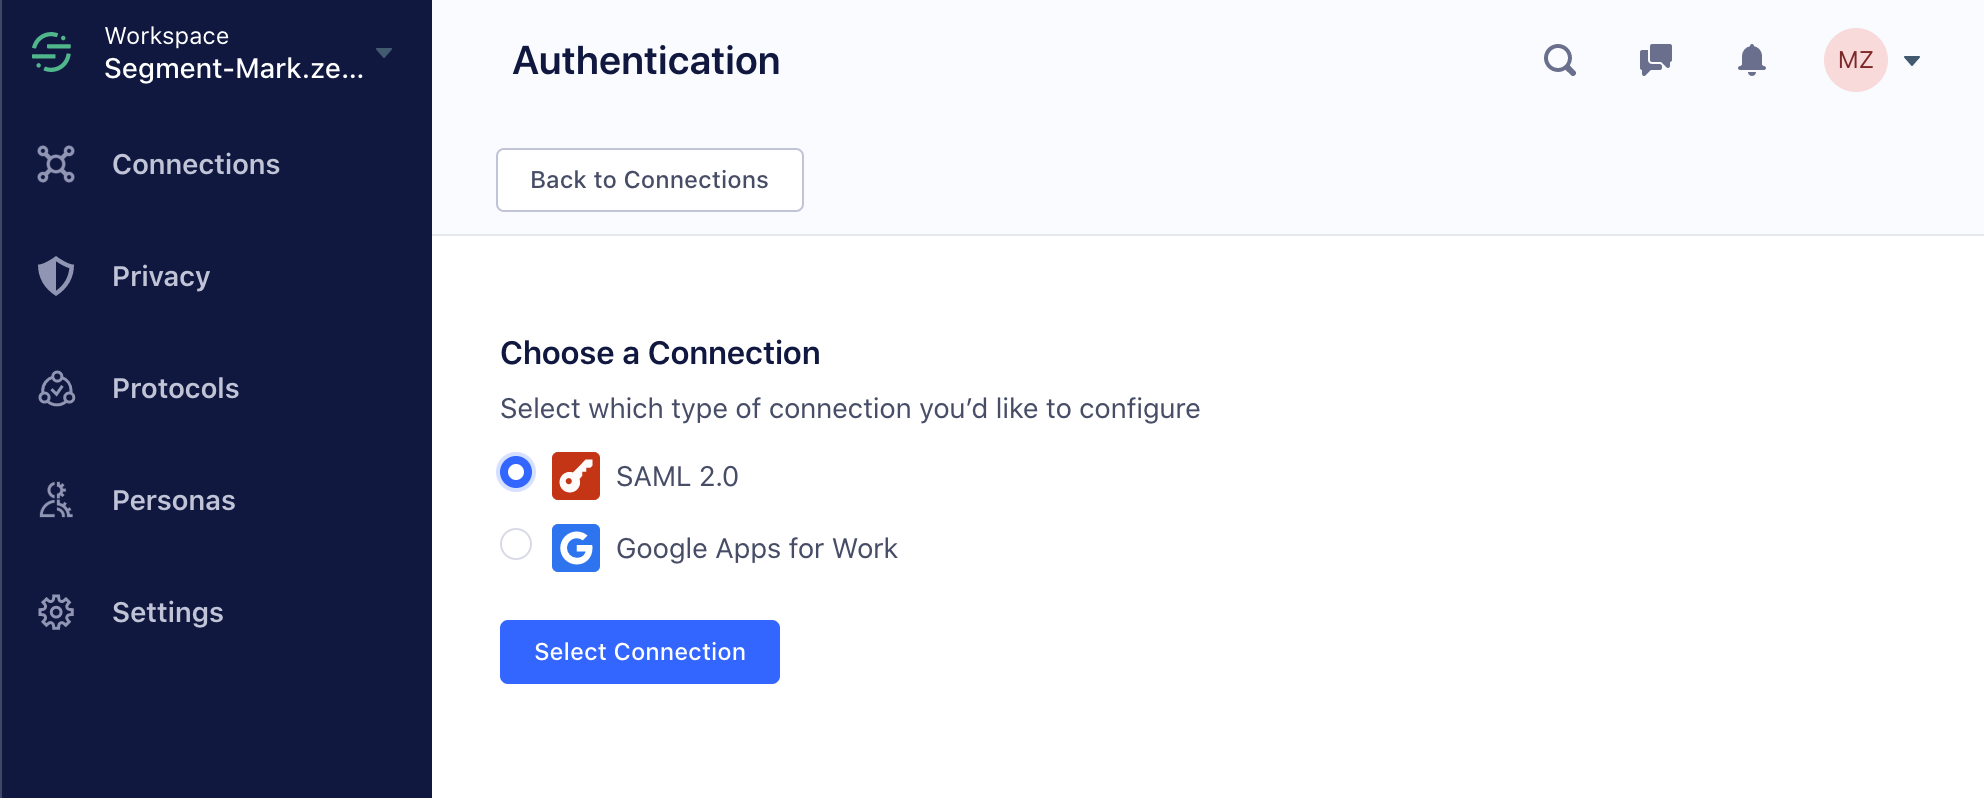
To get started, go to your workspace settings and navigate to Authentication > Connections > Add new Connection. Follow the steps to create a SAML connection.
Prepare your IdP for the connection
Segment officially supports apps for Okta, Microsoft Entra ID, and OneLogin. Next, find Segment in your IdP’s app catalog, and follow the set up instructions they provide.
If you’re using a different IdP, you must create a custom SAML-based application.
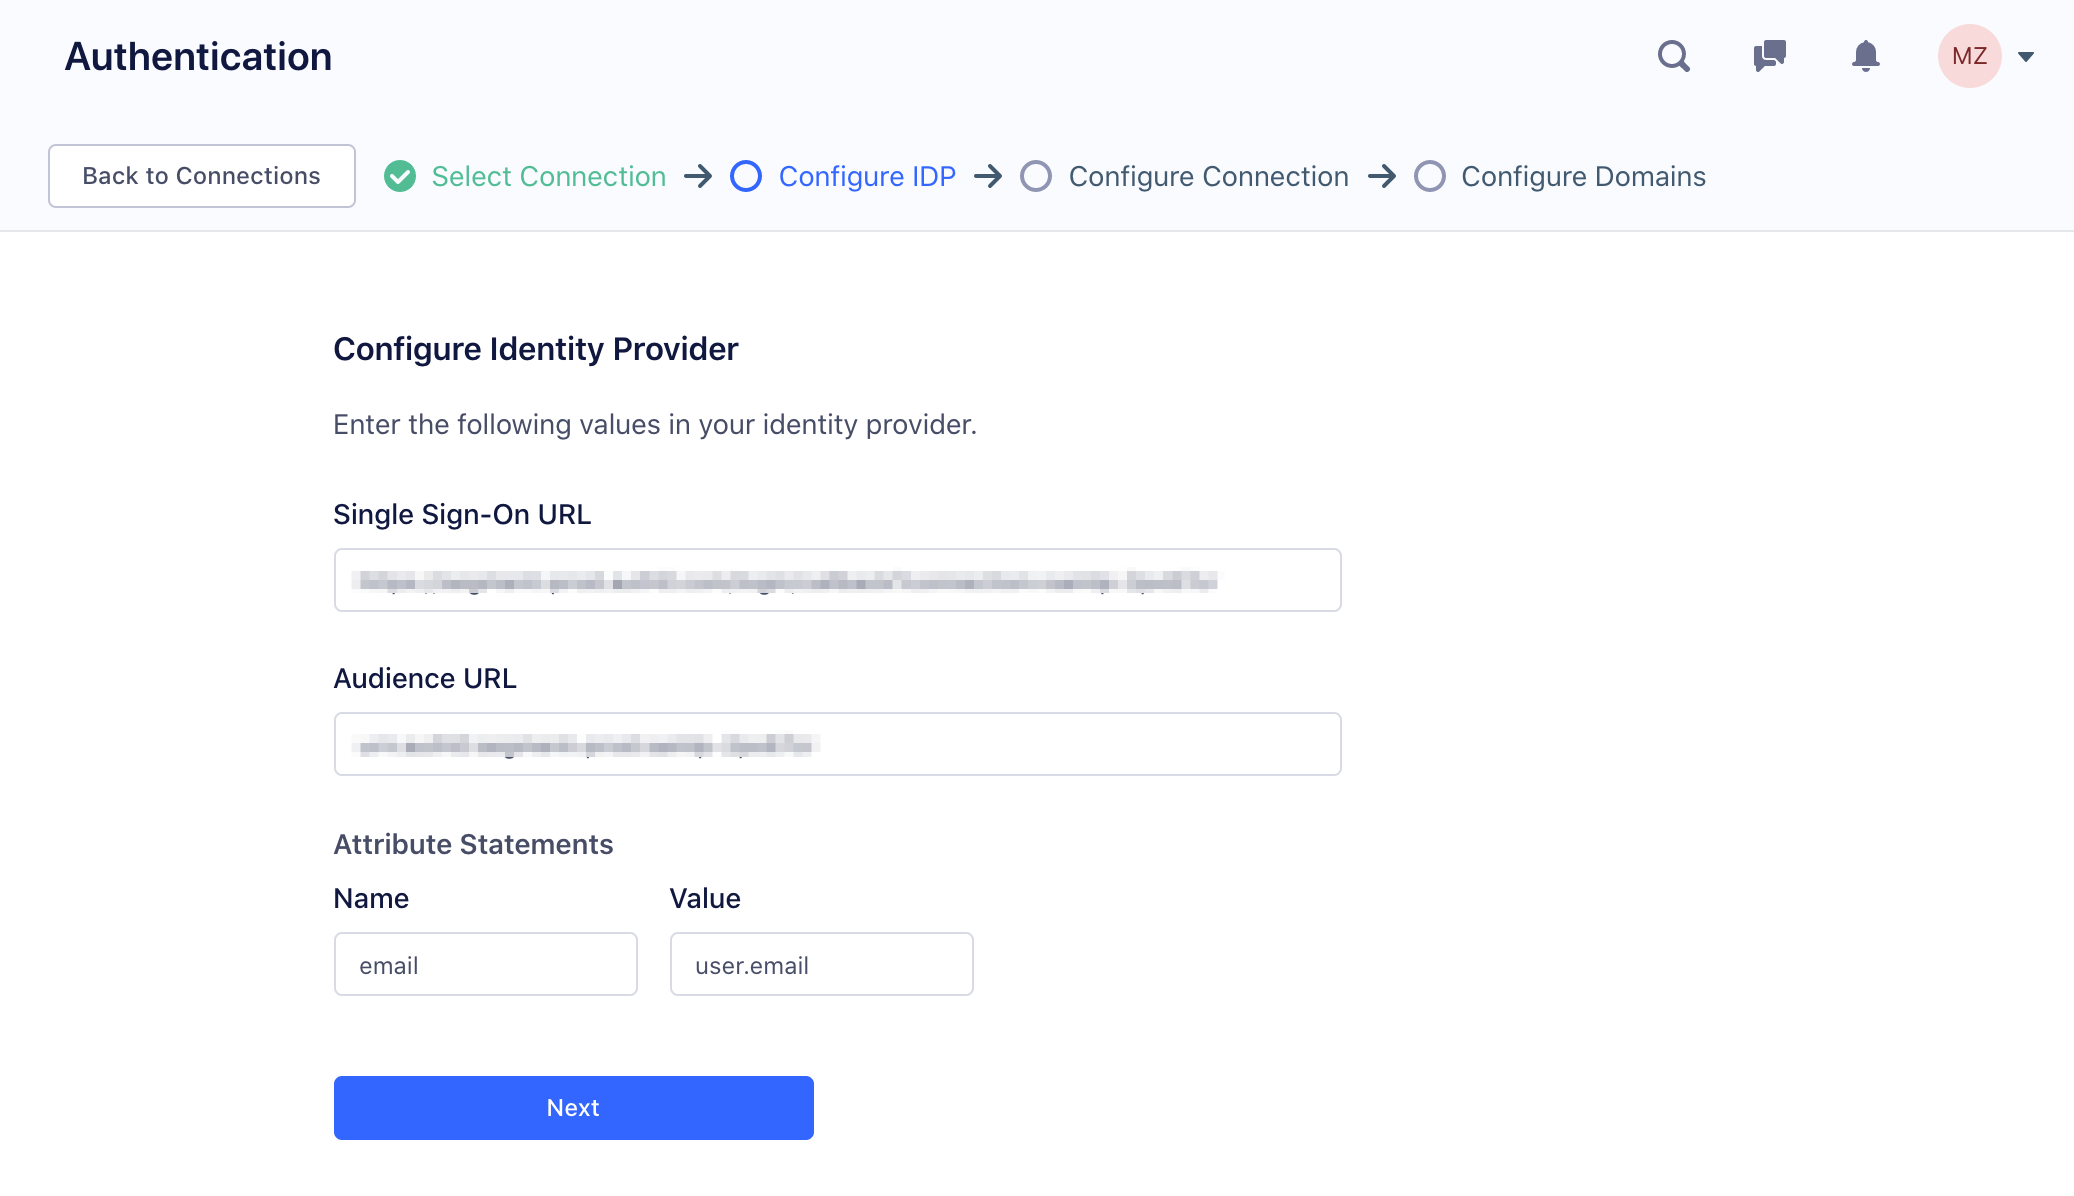
Your provider will ask you for a few things from Segment, which Segment provides in the setup flow:
A few gotchas to look out for:
-
For GSuite configurations, make sure the
Start URLfield in Service Provider Details is left blank. -
Different IdPs have different names for the Audience URL. Some call it “Audience URI”, some call it “Entity ID”, some call it “Service Provider Entity ID.” It’s likely there are only two required fields without correct defaults, and they correspond to the
SSO URLandAudience URLvalues above. -
In all IdPs Segment works with, the default
NameIDoption is the correct one. Make sure it’s using theemailAddressschema. -
In all IdPs Segment works with, the default connection encryption options are the correct ones. (Signed Response & Assertion Signature with SHA256, Unencrypted Assertions).
-
Different IdPs store records of your employees differently. The only attribute mapping Segment requires is to make sure you’re sending
email. In Okta this is atuser.email. In Duo this ismail. -
Make sure you’ve enabled “send all attributes” (not just NameID) if applicable for your IdP.
-
No
RelayStateis required. This is also sometimes calledTarget.
After you create the application in your IdP, you can come back to Segment and click “Next”.
Configure Segment to Talk to Your IdP
Your IdP provides a URL and x.509 certificate. Copy them into their respective fields in Segment.
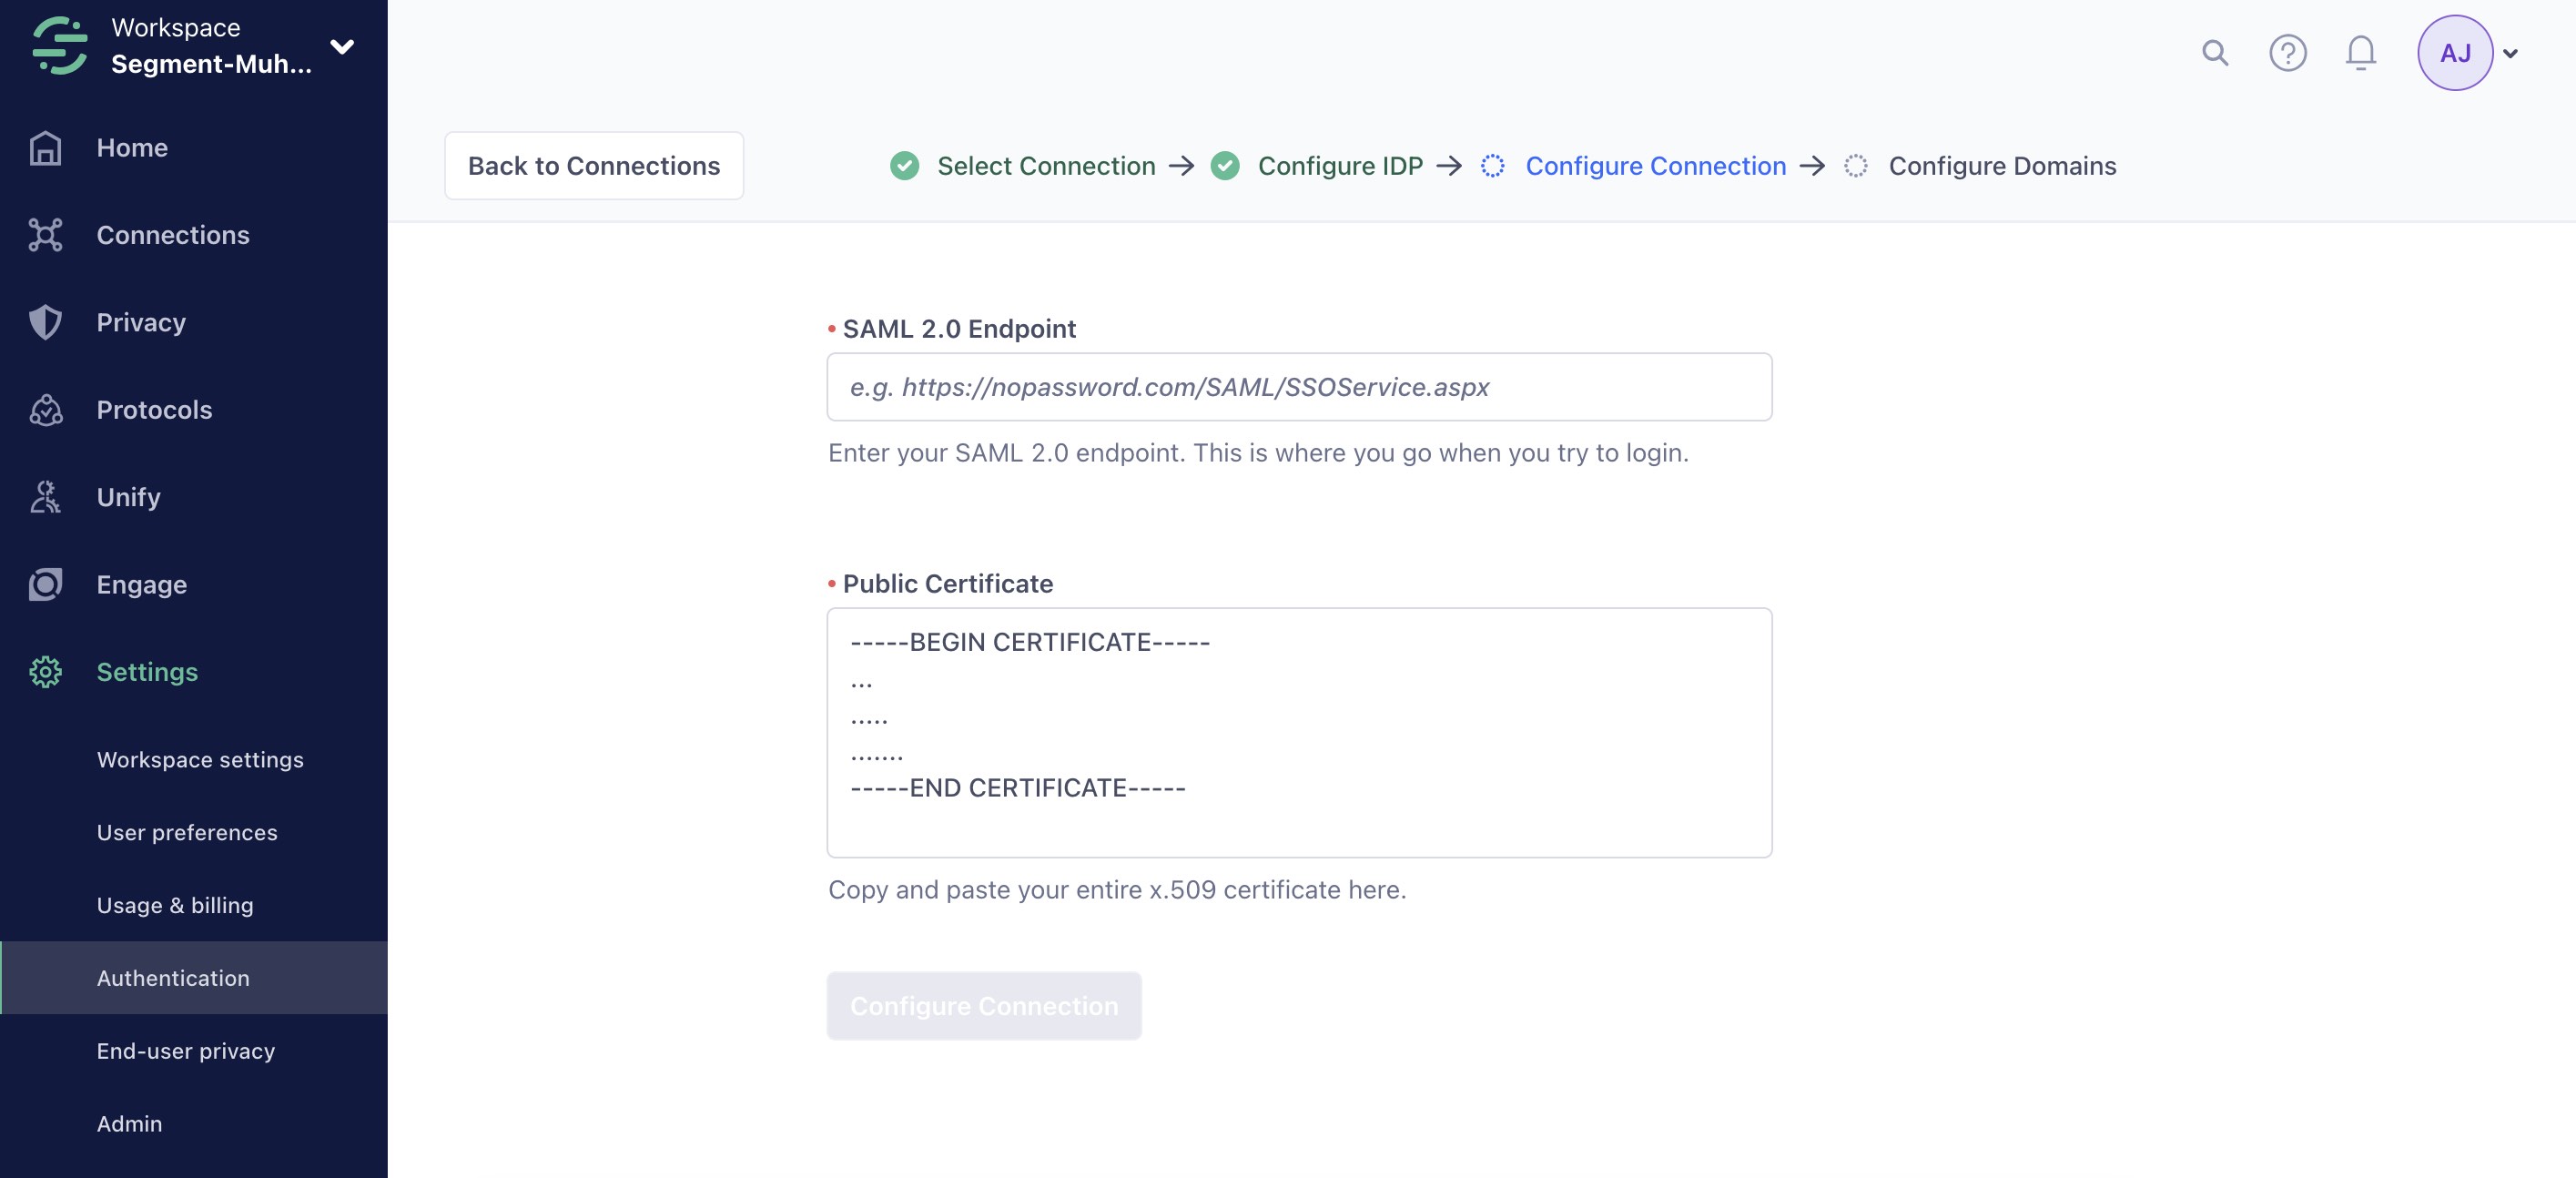
Then, click “Configure Connection.”
You’re all set.
Test your connection with IdP-initiated SSO
Back at the connections page, make sure your connection is enabled with the switch on the right.
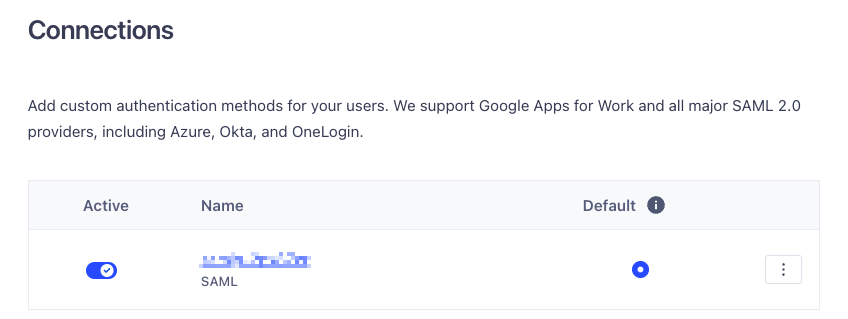
You can now test using IdP-initiated SSO (by clicking login to Segment from within your IdP) is working correctly. If not, double check the IdP configuration gotchas section above.
Require SSO
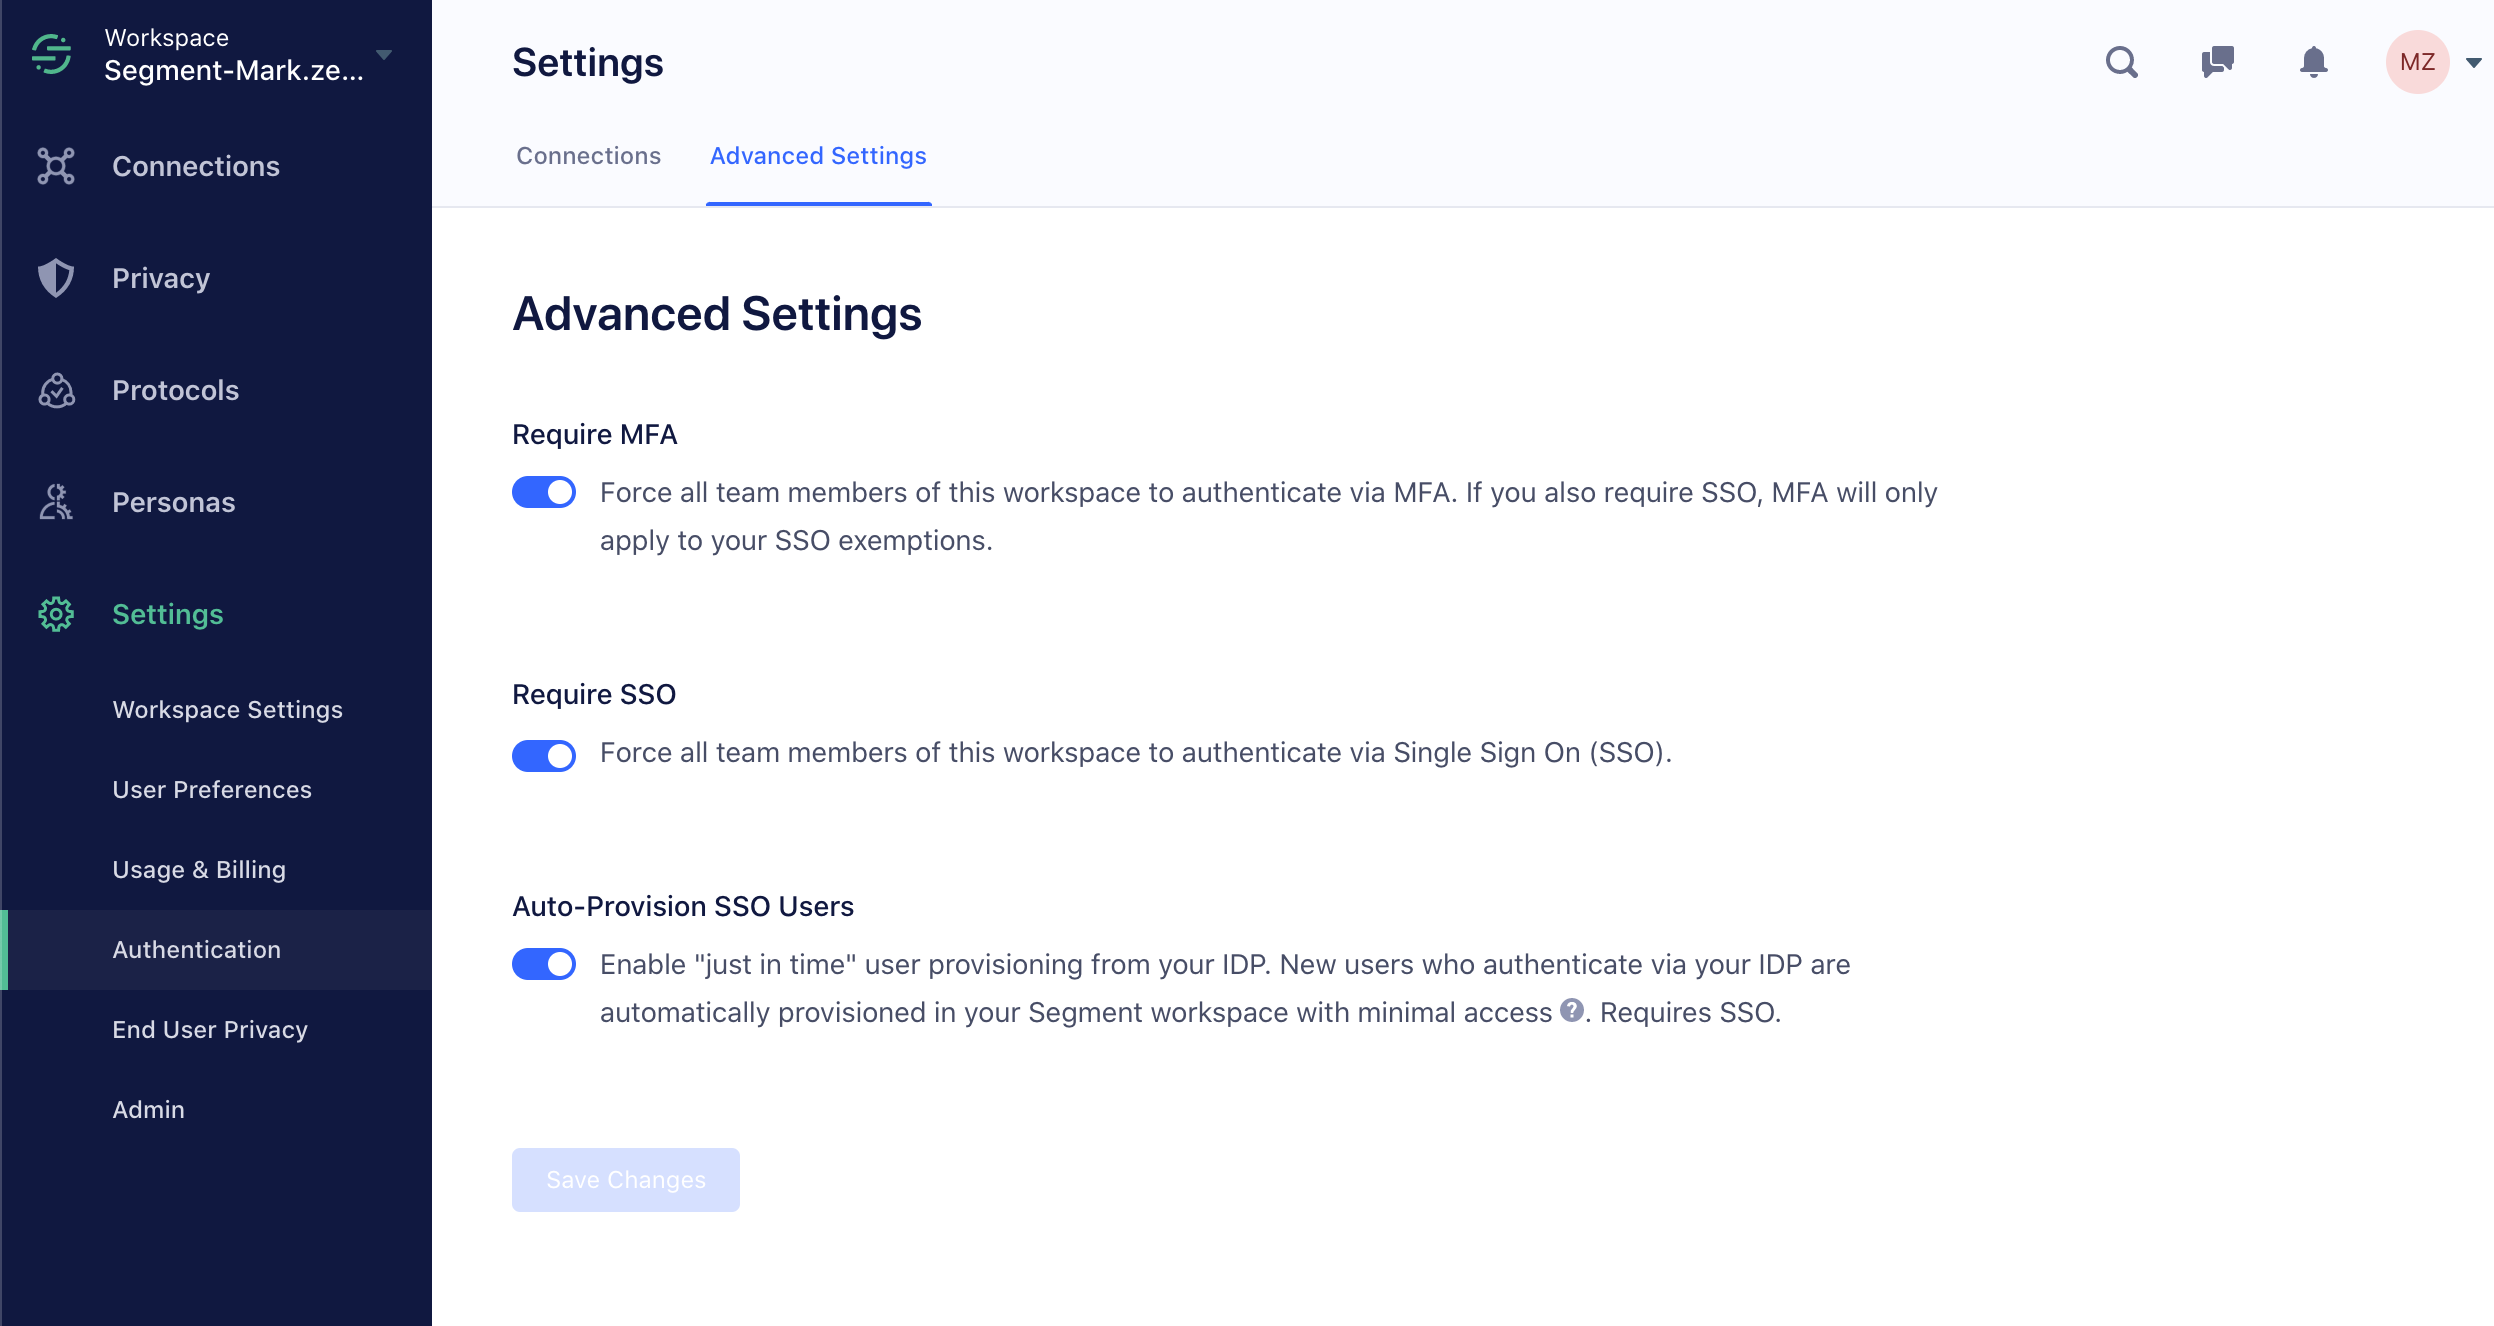
For most customers, Segment recommends requiring SSO for all users. If you do not require SSO, users can still log in with a username and password. If some members cannot log in using SSO, Segment also supports SSO exceptions.
These options are off by default, but configurable on the “Advanced Settings” page.
Setup — GSuite
To configure GSuite for use with Segment, go to your workspace settings and choose the “Connections” tab under “Authentication” and click “Add New Connection.” Follow the steps to create a “Google Apps For Work” connection.
Enter your domain (or, if you’ve verified it already, choose it from the dropdown) and then click the resulting link to authorize the connection.
Enabling Segment-initiated login
Segment supports SSO on the login page for emails that match your workspace’s domain.
In order to enable this, you’ll need to verify your domain with Segment. To do that, go to the “Domains” tab under “Authentication” in the workspace settings page.
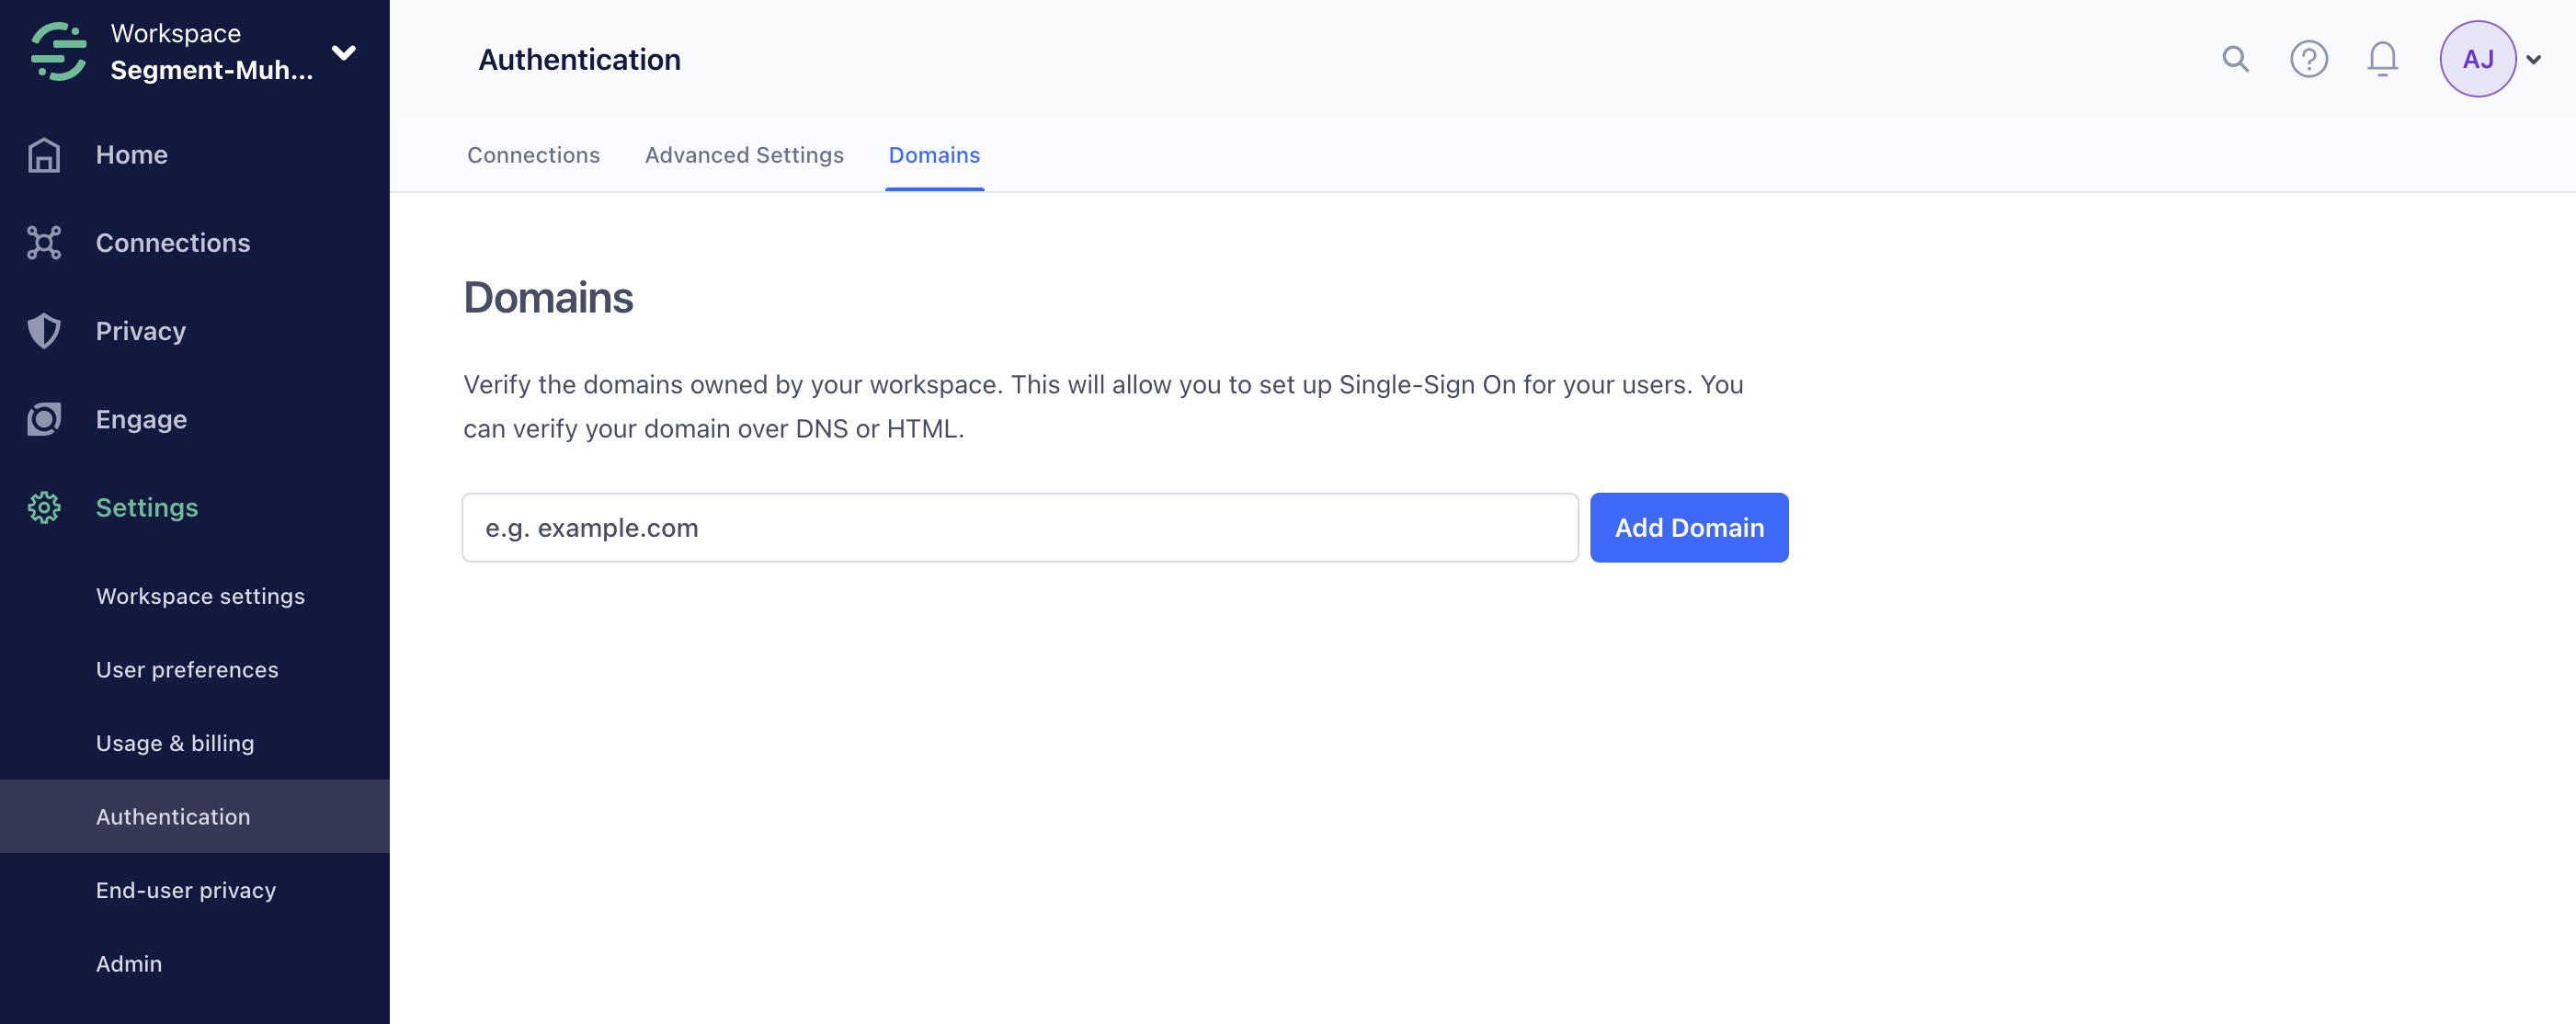
Enter your domain and click “Add Domain.” When you click verify, you’re given two options to verify your domain, either using a meta tag to add to your /index.html at the root, or a DNS text record that you can add through your DNS provider. After you do so and click verify, you can move to the next step.
Domain tokens expire 14 days after they are verified.
Configuring SSO to access multiple workspaces
To configure SSO for multiple workspaces, your admin must configure access to each workspace as a separate app in your identity provider. You are unable to use verified domain(s) across multiple workspaces and will encounter the following error if you add a domain that is already verified in another workspace:
Warning: This domain has already been claimed.
After your administrator configures separate apps for each workspace in your IdP, the end-users can log in to the IdP and click on the relevant app for the workspace you are trying to access. This is also referred to as IdP-initiated SSO.
Okta setup
The Okta/Segment SAML integration supports the following features:
- IdP-initiated SSO
- SP-initiated SSO
- JIT (Just-in-time) provisioning
For more information on these features, visit the Okta Glossary.
Configuration steps
To set up the Okta/Segment SAML integration, you’ll first carry out several steps in Segment, then finish in Okta.
Segment steps
Follow these steps in Segment to set up the Okta/Segment SAML integration:
- Log in to Segment as an administrator.
- Navigate to Settings > Authentication > Connections, then click Add new Connection.
- Select SAML 2.0, then click Select Connection.
- On the Configure IDP page, copy your Customer ID, which you’ll find after
?connection=in the Single Sign-on URL field. You’ll need this ID for a later step.- For example, if your Single Sign-On URL is
https://acme.domen.com/login/callback?connection=a1b2c3d4, your Customer ID isa1b2c3d4.
- For example, if your Single Sign-On URL is
- Click Next.
- On the Configure Connection page, enter your SAML 2.0 Endpoint and Public Certificate. You can generate both in your Okta Admin Dashboard. After you’ve entered both, click Next.
- (Optional:) Enter your domain, click Add Domain, then click Verify.
- When you click verify, Segment gives you two options to verify your domain: using a meta tag to add to your
/index.htmlfile at the root, or a DNS TXT record that you can add through your DNS provider. Domain tokens expire 14 days after they are verified. - Carry out Step 7 only if you want to enable SP-initiated flow, otherwise click Skip.
- When you click verify, Segment gives you two options to verify your domain: using a meta tag to add to your
- Return to Settings > Authentication > Connections and toggle the Active switch to enable your SAML configuration.

Okta steps
Finish setting up the Okta/Segment SAML integration by carrying out these steps in Okta:
- In Okta, go to Applications > Catalog > Segment & click “Add Integration”.
- Enter an Application Label for your integration and click Next.
- Switch to “Sign-On Options” tab and select “SAML 2.0”.
- In “Advanced Sign-on Settings”, enter the Customer ID you copied in Step 4 of the Segment steps.
- For Application username format, select Email.
- Click Save.
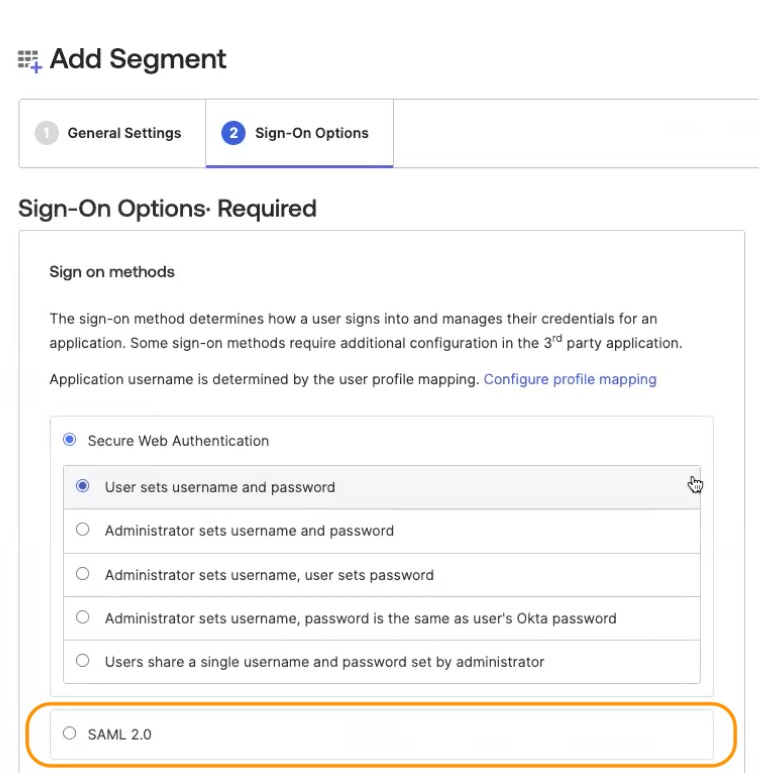
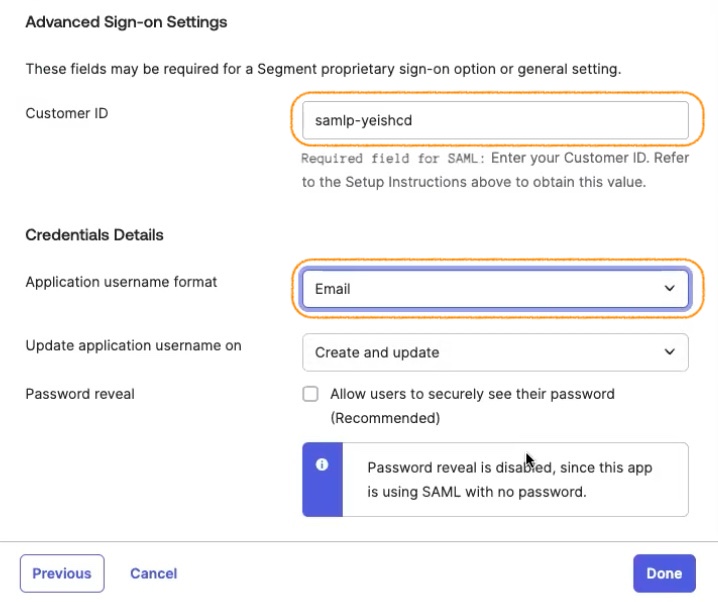
You’ve now completed setup. For SP-initiated SSO, follow these steps:
- Go to
https://app.segment.com. - Enter your email, select Single Sign-On, then click Log In.
SSO Frequently Asked Questions
Segment supports “just in time” user permissioning; new users who authenticate using your IdP are automatically created in Segment as minimal-access (read-only) members. If the user already exists in Segment then Segment associates the IdP-identity with the existing Segment user account. Segment also supports user provisioning and role mapping using SCIM.
Yes, users can be automatically de-provisioned if you use SCIM.
Segment allows users to own their own workspaces. While your IdP authentication will ensure that any non-owners must have logged in with SSO to access your workspace, they can still log into Segment with a username and password to access their own workspaces.
Workspace owners can invite additional owners with any domain using the traditional invite mechanism. If the workspace is configured to require SSO, and the user is not on your IdP, you can add an Exemption under Workspace Settings > Authentication > Advanced Settings.
After SSO is configued to access multiple workspaces, you will have slightly different signin experience in the below scenarios
- When you are switching between workspaces, and you have already logged in via SSO, you will need to sign in again before accessing other workspaces.
- When you visit Segment login page to sign in via SSO, you will only be redirected to one workspace which is also linked with the verified domain(s). It is because you are actually using the Segment-initiated SSO in this scenario.
This page was last modified: 30 May 2024
Need support?
Questions? Problems? Need more info? Contact Segment Support for assistance!